Change Copyright Year At Footer Of magento

9. Januar 2015 at 10:21

Was asked once by client how to make the copyright year at the footer of Magento site so that it changes automatically every year without doing it manually every year.

Solution one about Template Change and PHP

Copy the file app/design/frontend/default/default/template/page/html/footer.phtml
to your them-folder e.g. app/design/frontend/default/fly2marsmedia/template/page/html/footer.phtml
and open this file in your editor.

Change the

<address><?php echo $this->getCopyright() ?></address>

to

<address>&copy; <?php echo Mage::getModel('core/date')->date('Y') . ' ' . $this->getCopyright() ?></address>

Then
1) Log in to your Magento admin panel

2) Navigate to system > configuration > General > Design.

3) Click to expand the Footer section

4) Inside the Copyright text field remove the „&copy 2014“ part, this first part is changed automatically!

Solution Two about Magento-Admin-Panel configuration and javascript

1) Log in to your Magento admin panel

2) Navigate to system > configuration > General > Design.

3) Click to expand the Footer section

4) Inside the Copyright text field replace the @copy; YYYY with

&copy; <script type="text/javascript">
var d = new Date();
document.write(d.getFullYear())
</script>

Please share this article von facebook & google plus or where you want, thank you!

Magento: Fixing error „[unknown object].fireEvent()“

8. Januar 2015 at 10:02

Recently I’ve encountered the following Javascript error in my Magento store:

error: error in [unknown object].fireEvent():
event name: address_country_changed
error message: zipElement.up(…).down(…) is undefined

This error pops out when creating the order from admin panel and entering customer shipping address. It pops out when editing every filed in the address, which is quite annoying.

Regarding to this forum post, this has something to do with defining the zip code as not required filed in the database. Specialists recommend to set zip code as required filed in the database and then setting it as not required on the country basis. But people report that setting so will still not make zip code as optional field.

So I decided to do my own fix. Here it is:

1. Copy the file app\design\adminhtml\default\default\template\directory\js\optional_zip_countries.phtml to your local design-folder like

app\design\adminhtml\default\fly2marsmedia\template\directory\js\optional_zip_countries.phtml

2. Navigate approximately to line 57.

3. Find the function setPostcodeOptional(zipElement, country)

4. Find the following line: zipElement.up(1).down(‚label > span.required‘).hide();

5. Change it to the following code:

var zipElementLabel = zipElement.up(1).down('label > span.required');
 if (zipElementLabel)
 zipElementLabel.hide();

6. Find the following line: zipElement.up(1).down(‚label > span.required‘).show();

7. Change it to the following code:

var zipElementLabel = zipElement.up(1).down('label > span.required');
if (zipElementLabel)
zipElementLabel.show();

Notice that this code repeats two times inside the function, but differs a little bit in „hide()“ and „show()“ calls at the end.

8. Save the file and upload to the server. Page reload might be required.

This helped me fighting the mentioned error in Magento version 1.9.0.1 and other versions.

Please share this article von facebook & google plus or where you want, thank you!
Magento Warenkorb Daten im Header / Warenkorb auslesen – Magento: get cart data

6. Januar 2015 at 14:58
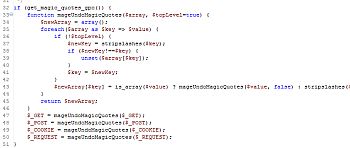
Den Warenkorb von Magento kann man wie folgt auslesen:
<?php
      $_countHelper = $this->helper('checkout/cart')->getSummaryCount();  //get total items in cart
      $_totalHelper = $this->helper('checkout/cart')->getQuote()->getGrandTotal(); //get total price
      if($count==0)
      {
        echo $this->__('<a href="/checkout/cart" class="cartgo">(0 ITEMS)</a>',$count);
      }
      if($count==1)
      {
        echo $this->__('<a href="/checkout/cart" class="cartgo">(1 ITEM)</a>',$count);
      }
      if($count>1)
      {
        echo $this->__('<a href="/checkout/cart" class="cartgo">(%s ITMES)</a>',$count);
      }
      echo $this->__('', $this->helper('core')->formatPrice($total, false));
    ?>

Please share this article von facebook & google plus or where you want, thank you!

Magento: Add custom column in admin grid with own data & filter

29. August 2014 at 13:18

How to create a custom grid filter with a new column with own data (not from collection) and filter this data?

First Step

Enhance the grid, for example extends the Mage_Adminhtml_Block_Catalog_Category_Tab_Product

overwrite the  _prepareColumns() methode with new column

      $this->addColumn('price_yesno', array(
            'header'    => Mage::helper('catalog')->__('Price exist'),
            'sortable'  => true,
            'width'     => '60',
            'index'     => 'price',
            'type'      => 'options',
            'align'     => 'center',
            'renderer'  => 'Fly2mars_Catalog_Block_Adminhtml_Category_Renderer_Hasprice',
            'editable'  => 0,
            'options' => array('1' => 'Yes', '0' => 'No'),
            'filter_condition_callback' => array($this, '_filterHasPrice')
        ));
return Mage_Adminhtml_Block_Widget_Grid::_prepareColumns();

And add in the same class the following callback methode

    protected function _filterHasPrice($collection, $column)
    {
        $value = $column->getFilter()->getValue();
        $collection = $this->getCollection();
        if($value == 1) {
            $collection->addFieldToFilter('price', array('notnull' => true));
        } else {
            $collection->addFieldToFilter('price', array('null' => true));
        }
        return $this;
    }

Second Step

You need the renderer, for this example you add in the file Fly2mars_Catalog_Block_Adminhtml_Category_Renderer_Hasprice

class Fly2mars_Catalog_Block_Adminhtml_Category_Renderer_Hasprice
    extends Mage_Adminhtml_Block_Widget_Grid_Column_Renderer_Abstract
{
    /**
     * Check if product has price
     *
     * @param   Varien_Object
     * @return  string
     */
    protected function _getValue(Varien_Object $row)
    {
        if($row->getData('price') != '') {
            return 'Yes';
        }
        return 'No';
    }
}

that’s it.

Please share this article von facebook & google plus or where you want, thank you!

Magento: convert single select attribute to multiselect

7. August 2014 at 17:24

Add in your entity-model following functions:

    /**
     * Get a text for option value
     *
     * @param string $value
     * @return string|false
     */
    public function getOptionText($value)
    {
        $options = $this->getAllOptions();
        foreach ($options as $option) {
            if ($option['value'] == $value) {
                return $option['label'];
            }
        }
        return false;
    }
    public function getFlatColums()
    {
        $columns = array();
        $columns[$this->getAttribute()->getAttributeCode()] = array(
            'type'      => 'VARCHAR',
            'unsigned'  => false,
            'is_null'   => true,
            'default'   => null,
            'extra'     => null
        );
        return $columns;
    }
    /**
     * Retrieve Indexes for Flat
     *
     * @return array
     */
    public function getFlatIndexes()
    {
        $indexes = array();
        $index = 'IDX_' . strtoupper($this->getAttribute()->getAttributeCode());
        $indexes[$index] = array(
            'type'      => 'index',
            'fields'    => array($this->getAttribute()->getAttributeCode())
        );
        return $indexes;
    }
    /**
     * Retrieve Select for update Attribute value in flat table
     *
     * @param   int $store
     * @return  Varien_Db_Select|null
     */
    public function getFlatUpdateSelect($store)
    {
        return Mage::getResourceModel('eav/entity_attribute_option')
            ->getFlatUpdateSelect($this->getAttribute(), $store, false);
    }

Now the setup script to convert 2 attributes

$this->startSetup();
$installer = $this;
$attributes = array(array('name' => 'ENTER_ATTRIBUTE_KEY_HERE', 'attribute_id' => ''),  // enter the attribute_key for ENTER_ATTRIBUTE_KEY_HERE
                    array('name' => 'ENTER_ATTRIBUTE_KEY_HERE', 'attribute_id' => '')
            );
$productEntityTypeId = Mage::getModel('catalog/product')->getResource()->getTypeId();
foreach($attributes as $id => $value) {
    $attributeId = $installer->getAttributeId($productEntityTypeId, $value['name']);
    $attributes[$id]['attribute_id'] = $attributeId;
    $installer->updateAttribute($productEntityTypeId, $attributeId, array(
        'frontend_input' => 'multiselect',
        'backend_type' => 'varchar',
        'backend_model' => 'eav/entity_attribute_backend_array'
    ));
}
foreach($attributes as $id => $attributeData) {
    // now copy attribute values from old attribute to new
    $sql = 'INSERT INTO ' . $this->getTable('catalog_product_entity_varchar') . '(entity_type_id, attribute_id, store_id, entity_id, value)
            SELECT entity_type_id, attribute_id, store_id, entity_id, value
            FROM ' . $this->getTable('catalog_product_entity_int')
            . ' WHERE attribute_id = ' . $attributeData['attribute_id'] . ';';
    $installer->run($sql);
    // delete values from old attribute (you must do this)
    $sql = 'DELETE FROM ' . $this->getTable('catalog_product_entity_int')
        . ' WHERE entity_type_id = 4 and attribute_id = ' . $attributeData['attribute_id'] . ';';
    $installer->run($sql);
}
$this->endSetup();

Magento: Datum und Zeit / Date and Time

27. Mai 2014 at 14:48

Bei Operationen mit Datum und Zeit sollten die Klassen Mage_Core_Model_Date oder
Mage_Core_Model_Locale verwendet werden, um Zeitverschiebungen zu berücksichtigen.

Verwendung von now() und date() dafür nicht geeignet.

Beispiele zur Verwendung der Date Funktion in Magento

// get timestamp on server based time
$now = Mage::getModel('core/date')->timestamp(time());
// get server date and time
$now = Mage::getModel('core/date')->date('Y-m-d h:i:s');
// get UTC date and time
$now = Zend_Date::now();
$anyDate = '2011-12-11';
$currentDate = Mage::getModel('core/date')->date('d.m.Y', strtotime($anyDate));
// a more complete example with the im admin panel configured timezone
$datetime = Zend_Date::now();
// admin controls this output through configuration
$datetime->setLocale(Mage::getStoreConfig(
Mage_Core_Model_Locale::XML_PATH_DEFAULT_LOCALE))
->setTimezone(Mage::getStoreConfig(
Mage_Core_Model_Locale::XML_PATH_DEFAULT_TIMEZONE));
echo $datetime->get(Zend_Date::DATETIME_SHORT);
// formated
$date = $datetime->toString("Y-MM-d_H:m:s");

Wie deaktiviert man korrekt Observer-Funktionen OHNE die Core-Module zu verändern?

6. Mai 2014 at 13:14

Schreibt ein eigenes Module, dort in der etc/config.xml ist es möglich über z.b. folgende Zeilen den Aufruf der Methode „initByRequest“ durch das Event controller_action_predispatch zu deaktivieren.

Wichtig dabei folgende Zeile zum deaktivieren des Events: <type>disabled</type>

    <frontend>
        <events>
            <controller_action_predispatch>
                <observers>
                    <log>
                        <class>log/visitor</class>
                        <method>initByRequest</method>
                        <type>disabled</type>
                    </log>
                </observers>
            </controller_action_predispatch>
		</events>
	</frontend>

Warum nicht direkt im core?

Durch saubere Trennung zwischen eigenem (veränderten) und core-code, ist eure Magento-Version weiterhin wartbar,
daher Updates (vor allem Security-Fixes) lassen sich einfacher einspielen.

Mit jeder direkten Änderung am core-code, verschlechtert sich die Wartbarkeit der Magento-Suite.

Wenn euch der Tipp geholfen hat, bitte diesen Artikel auch bei Google+ und Facebook teilen, danke für euren Support!

Eigene Plugins in PHPStorm einbinden – z.b. den Magento Cache über PHPStorm löschen

3. Dezember 2013 at 13:30

php code

In PHPStorm ist es möglich eigene Menüpunkte anzulegen und für diese(n) Befehle zu hinterlegen.

Ein nützlich Beispiel ist z.b. den Shell-Code für das löschen des Magento-Caches zu hinterlegen.

So geht’s:

  1. In PHP-Storm im Menü „File/Einstellungen“ wählen.
  2. Unter „external tools“ (einfach danach suchen) könnt ihr ein neuen Eintrag hinzufügen,
    z.b.: alias clear-magento-cache=“rm -Rf var/cache/mage–*“
  3. Im Menü unter „Tools -> Magento -> Clear Magento Cache“ findet ihr nun den entsprechenden Eintrag

Das war’s schon.

Wenn euch der Tipp geholfen hat, bitte diesen Artikel auch bei Google+ und Facebook teilen, danke für euren Support!


Magento: Kunden-ID bei Bestellungen ändern / Bestellungen anderen Kunden zuweisen

19. November 2013 at 12:27

Möchtet ihr Bestellungen einen anderen Kunden zuweisen, ggf. weil die Bestellungen dem falschen Kunden zugewiesen sind (z.b. nach einer Datenmigration) so könnt ihr dies über die folgenden SQL-Statements erledigen:

UPDATE sales_flat_order SET customer_id = 949791 WHERE customer_id = 616151;
 UPDATE sales_flat_order_address SET customer_id = 949791 WHERE customer_id = 616151;
 UPDATE sales_flat_shipment SET customer_id = 949791 WHERE customer_id = 616151;
 UPDATE sales_flat_order_grid SET customer_id = 949791 WHERE customer_id = 616151;

Get Price from Database

6. November 2013 at 17:34
  1. eav_entity_type ——> See catalog_product’s Id (10)
  2. SELECT * FROM `eav_attribute` WHERE `attribute_code` = ‘price’
  3. Get attribute_id where entity_type_id=’10’ (69)
  4. SELECT * FROM `catalog_product_entity_decimal` WHERE `attribute_id` = ‘69’
  5. The value you get is the Price of the Product Whose Id correspond entity_id