Popular Tags:

WordPress: Wartungsmodus nicht beendet / What to do when the maintenance mode is not terminated in WordPress?

13. April 2016 at 18:35

Wordpress logo

What to do when the maintenance mode is not terminated in WordPress?

Thank God it’s very easy to exit the maintenance mode manually. All you need is FTP access to the website (which already leads many to a non-detachable hurdle. Here the WordPress supporters of trust or the webhost ask).

Step 1: Connect with an FTP program (for example, FileZilla) to the web server
Step 2: Go to the root directory of WordPress installation
Step 3: Delete the file .maintenance
Step 4: Enjoy that page works again
retry update: Step 5

You see, it is not lost when a WP update stops time.

Please share this article von facebook & google plus or where you want, thank you!

Was tun, wenn der Wartungsmodus in WordPress nicht beendet wird?

Gottseidank ist es sehr einfach den Wartungsmodus manuell zu beenden. Man benötigt lediglich FTP Zugriff auf die Webseite (wobei das bei vielen schon zu einer nicht lösbaren Hürde führt. Hier den WordPress-Unterstützer des Vertrauens oder den Webhoster fragen).

Schritt 1: Verbinden mit einem FTP-Programm (z.B. FileZilla) auf den Webserver
Schritt 2: Wechseln in das Hauptverzeichnis der WordPress-Installation
Schritt 3: Löschen der Datei .maintenance
Schritt 4: Freuen, dass die Seite wieder funktioniert
Schritt 5: Update erneut versuchen

Man sieht, es ist nicht alles verloren, wenn ein WP-Update mal stehen bleibt.

Please share this article von facebook & google plus or where you want, thank you!

Magento: Add admin user with MySQL statement in the database

4. April 2016 at 11:34

sql-statement-mysql

This script quickly adds a Magento Admin user directly into the database. It is possible to run this script from the command line or by copying and pasting into phpMyAdmin. Just make sure to edit the following fields with your personalized data and import. Most of these fields are trivial, I’m just listing them so you don’t miss anything.

Set the salt portion of your password. You’ll rarely need to change this. If you do, just use two lower case letters of your choice.
Set your password. At least 8 characters in length and at least one digit.
Firstname: Enter admin’s first name.
Lastname: Enter admin’s last name.
Enter email of admin user.
Enter username where ‘myuser’ is set. Notice ‘myuser’ shows up in two places.
Enter Firstname again. This is more symbolic to label the rule.

LOCK TABLES `admin_role` WRITE , `admin_user` WRITE;
SET @SALT = "rp";
SET @PASS = CONCAT(MD5(CONCAT( @SALT , "password") ), CONCAT(":", @SALT ));
SELECT @EXTRA := MAX(extra) FROM admin_user WHERE extra IS NOT NULL;
INSERT INTO `admin_user` (firstname,lastname,email,username,password,created,lognum,reload_acl_flag,is_active,extra,rp_token_created_at)
VALUES ('Firstname','Lastname','email@example.com','myuser',@PASS,NOW(),0,0,1,@EXTRA,NOW());
INSERT INTO `admin_role` (parent_id,tree_level,sort_order,role_type,user_id,role_name)
VALUES (1,2,0,'U',(SELECT user_id FROM admin_user WHERE username = 'myuser'),'Firstname');
UNLOCK TABLES;

Please share this article von facebook & google plus or where you want, thank you!

Magento: A foreign key constraint fails when reindex – Solution

30. März 2016 at 14:08

magento-sql-query-to-delete-the-categories

Just execute the query in the database.

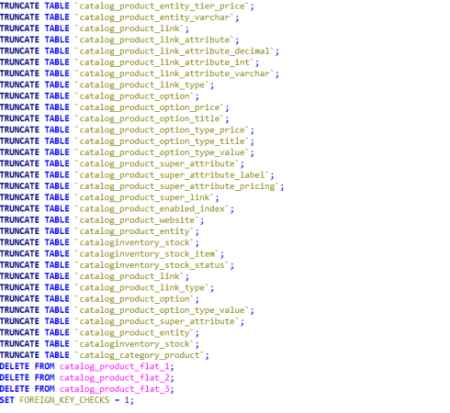
SET FOREIGN_KEY_CHECKS = 0;
TRUNCATE TABLE `catalog_product_bundle_option`;
TRUNCATE TABLE `catalog_product_bundle_option_value`;
TRUNCATE TABLE `catalog_product_bundle_selection`;
TRUNCATE TABLE `catalog_product_entity_datetime`;
TRUNCATE TABLE `catalog_product_entity_decimal`;
TRUNCATE TABLE `catalog_product_entity_gallery`;
TRUNCATE TABLE `catalog_product_entity_int`;
TRUNCATE TABLE `catalog_product_entity_media_gallery`;
TRUNCATE TABLE `catalog_product_entity_media_gallery_value`;
TRUNCATE TABLE `catalog_product_entity_text`;
TRUNCATE TABLE `catalog_product_entity_tier_price`;
TRUNCATE TABLE `catalog_product_entity_varchar`;
TRUNCATE TABLE `catalog_product_link`;
TRUNCATE TABLE `catalog_product_link_attribute`;
TRUNCATE TABLE `catalog_product_link_attribute_decimal`;
TRUNCATE TABLE `catalog_product_link_attribute_int`;
TRUNCATE TABLE `catalog_product_link_attribute_varchar`;
TRUNCATE TABLE `catalog_product_link_type`;
TRUNCATE TABLE `catalog_product_option`;
TRUNCATE TABLE `catalog_product_option_price`;
TRUNCATE TABLE `catalog_product_option_title`;
TRUNCATE TABLE `catalog_product_option_type_price`;
TRUNCATE TABLE `catalog_product_option_type_title`;
TRUNCATE TABLE `catalog_product_option_type_value`;
TRUNCATE TABLE `catalog_product_super_attribute_label`;
TRUNCATE TABLE `catalog_product_super_attribute_pricing`;
TRUNCATE TABLE `catalog_product_super_attribute`;
TRUNCATE TABLE `catalog_product_super_link`;
TRUNCATE TABLE `catalog_product_enabled_index`;
TRUNCATE TABLE `catalog_product_website`;
TRUNCATE TABLE `catalog_category_product_index`;
TRUNCATE TABLE `catalog_category_product`;
TRUNCATE TABLE `cataloginventory_stock_item`;
TRUNCATE TABLE `cataloginventory_stock_status`;
TRUNCATE TABLE `cataloginventory_stock`;
INSERT INTO `catalog_product_link_type`(`link_type_id`,`code`) VALUES (1,'relation'),(2,'bundle'),(3,'super'),(4,'up_sell'),(5,'cross_sell');
INSERT INTO `catalog_product_link_attribute`(`product_link_attribute_id`,`link_type_id`,`product_link_attribute_code`,`data_type`) VALUES (1,2,'qty','decimal'),(2,1,'position','int'),(3,4,'position','int'),(4,5,'position','int'),(6,1,'qty','decimal'),(7,3,'position','int'),(8,3,'qty','decimal');
INSERT INTO `cataloginventory_stock`(`stock_id`,`stock_name`) VALUES (1,'Default');
TRUNCATE TABLE `catalog_product_entity`;
SET FOREIGN_KEY_CHECKS = 1;

Please share this article von facebook & google plus or where you want, thank you!

Magento: Delete all categories with sql

23. März 2016 at 10:44

magento-sql-query-to-delete-the-categories

To delete all categories in Magento about sql you can use the following query.

If you has more than 3 stores, you must extend the entry „catalog_product_flat_1;“ with your store-id, e.g.:

DELETE FROM catalog_product_flat_3;
DELETE FROM catalog_product_flat_4;

and so on …

SET FOREIGN_KEY_CHECKS = 0;
TRUNCATE TABLE `catalog_category_entity`;
TRUNCATE TABLE `catalog_product_bundle_option`;
TRUNCATE TABLE `catalog_product_bundle_option_value`;
TRUNCATE TABLE `catalog_product_bundle_selection`;
TRUNCATE TABLE `catalog_product_entity_datetime`;
TRUNCATE TABLE `catalog_product_entity_decimal`;
TRUNCATE TABLE `catalog_product_entity_gallery`;
TRUNCATE TABLE `catalog_product_entity_int`;
TRUNCATE TABLE `catalog_product_entity_media_gallery`;
TRUNCATE TABLE `catalog_product_entity_media_gallery_value`;
TRUNCATE TABLE `catalog_product_entity_text`;
TRUNCATE TABLE `catalog_product_entity_tier_price`;
TRUNCATE TABLE `catalog_product_entity_varchar`;
TRUNCATE TABLE `catalog_product_link`;
TRUNCATE TABLE `catalog_product_link_attribute`;
TRUNCATE TABLE `catalog_product_link_attribute_decimal`;
TRUNCATE TABLE `catalog_product_link_attribute_int`;
TRUNCATE TABLE `catalog_product_link_attribute_varchar`;
TRUNCATE TABLE `catalog_product_link_type`;
TRUNCATE TABLE `catalog_product_option`;
TRUNCATE TABLE `catalog_product_option_price`;
TRUNCATE TABLE `catalog_product_option_title`;
TRUNCATE TABLE `catalog_product_option_type_price`;
TRUNCATE TABLE `catalog_product_option_type_title`;
TRUNCATE TABLE `catalog_product_option_type_value`;
TRUNCATE TABLE `catalog_product_super_attribute`;
TRUNCATE TABLE `catalog_product_super_attribute_label`;
TRUNCATE TABLE `catalog_product_super_attribute_pricing`;
TRUNCATE TABLE `catalog_product_super_link`;
TRUNCATE TABLE `catalog_product_enabled_index`;
TRUNCATE TABLE `catalog_product_website`;
TRUNCATE TABLE `catalog_product_entity`;
TRUNCATE TABLE `cataloginventory_stock`;
TRUNCATE TABLE `cataloginventory_stock_item`;
TRUNCATE TABLE `cataloginventory_stock_status`;
TRUNCATE TABLE `catalog_product_link`;
TRUNCATE TABLE `catalog_product_link_type`;
TRUNCATE TABLE `catalog_product_option`;
TRUNCATE TABLE `catalog_product_option_type_value`;
TRUNCATE TABLE `catalog_product_super_attribute`;
TRUNCATE TABLE `catalog_product_entity`;
TRUNCATE TABLE `cataloginventory_stock`;
TRUNCATE TABLE `catalog_category_product`;
DELETE FROM catalog_product_flat_1;
DELETE FROM catalog_product_flat_2;
DELETE FROM catalog_product_flat_3;
SET FOREIGN_KEY_CHECKS = 1;
insert  into `catalog_product_link_type`(`link_type_id`,`code`) values (1,'relation'),(2,'bundle'),(3,'super'),(4,'up_sell'),(5,'cross_sell');
insert  into `catalog_product_link_attribute`(`product_link_attribute_id`,`link_type_id`,`product_link_attribute_code`,`data_type`) values (1,2,'qty','decimal'),(2,1,'position','int'),(3,4,'position','int'),(4,5,'position','int'),(6,1,'qty','decimal'),(7,3,'position','int'),(8,3,'qty','decimal');
insert  into `cataloginventory_stock`(`stock_id`,`stock_name`) values (1,'Default');

Please share this article von facebook & google plus or where you want, thank you!

Magento: How to easily Debug Layout Xml Warning/Error?

16. März 2016 at 16:30

magento-xml-config-xml

If you get an error like „Warning: simplexml_load_string(): Entity: line 46: parser error : Comment not terminated in */lib/Varien/Simplexml/Config.php on line 510

in Magento you can do one of the following solution to solve this XML error.

This warning is related to some config.xml error, so a possible workaround to find out the exact file is to mod. the /lib/Varien/Simplexml/Config.php class.

You should modify Varien_Simplexml_Config::loadString() method:

public function loadString($string)
{
if (is_string($string)) {
// Enable internal errors
libxml_use_internal_errors(true);
$xml = simplexml_load_string($string, $this->_elementClass);
if (false === $xml) {
// Put breakpoint here
$errors = libxml_get_errors();
}
if ($xml instanceof Varien_Simplexml_Element) {
$this->_xml = $xml;
return true;
}
} else {
Mage::logException(new Exception('"$string" parameter for simplexml_load_string is not a string'));
}
return false;
}

In case the error is related to some Layout file ( Update.php line 444 warning )

You should modify Mage_Core_Model_Layout_Update::getFileLayoutUpdatesXml() method in a similar way:

public function getFileLayoutUpdatesXml($area, $package, $theme, $storeId = null)
{
if (null === $storeId) {
$storeId = Mage::app()->getStore()->getId();
}
/* @var $design Mage_Core_Model_Design_Package */
$design = Mage::getSingleton('core/design_package');
$layoutXml = null;
$elementClass = $this->getElementClass();
$updatesRoot = Mage::app()->getConfig()->getNode($area.'/layout/updates');
Mage::dispatchEvent('core_layout_update_updates_get_after', array('updates' => $updatesRoot));
$updateFiles = array();
foreach ($updatesRoot->children() as $updateNode) {
if ($updateNode->file) {
$module = $updateNode->getAttribute('module');
if ($module && Mage::getStoreConfigFlag('advanced/modules_disable_output/' . $module, $storeId)) {
continue;
}
$updateFiles[] = (string)$updateNode->file;
}
}
// custom local layout updates file - load always last
$updateFiles[] = 'local.xml';
$layoutStr = '';
foreach ($updateFiles as $file) {
$filename = $design->getLayoutFilename($file, array(
'_area'    => $area,
'_package' => $package,
'_theme'   => $theme
));
if (!is_readable($filename)) {
continue;
}
$fileStr = file_get_contents($filename);
$fileStr = str_replace($this->_subst['from'], $this->_subst['to'], $fileStr);
libxml_use_internal_errors(true);
$fileXml = simplexml_load_string($fileStr, $elementClass);
if (false === $fileXml) {
// Put breakpoint here
$errors = libxml_get_errors();
$err = array($filename, $errors);
// error detail and file name will be printed
Zend_Debug::dump($err);
die();
}
if (!$fileXml instanceof SimpleXMLElement) {
continue;
}
$layoutStr .= $fileXml->innerXml();
}
$layoutXml = simplexml_load_string('<layouts>'.$layoutStr.'</layouts>', $elementClass);
return $layoutXml;
}

Now just reload the page a read the error info.

Please share this article von facebook & google plus or where you want, thank you!

Anleitung: PostgreSQL-Servers unter xampp installieren

19. Januar 2016 at 15:51

db

Ein PostgreSQL-Servers unter xampp installieren ist gar nicht so schwer, hier die Anleitung dazu:

Nach dem XAMPP installiert ist legt man im Ordner unter „C:\XAMPP“ (oder wo xampp installiert wurde) ein neuen Ordner namens „pgsql“ sowie darin ein Ordner „data“ (also C:\xampp\pgsql\data) an. Die PostgreSQL könnt ihr laden unter http://www.postgresql.org/download/ .

Startet die Installationsroutine von postgresql und ändert das Installationsverzeichnis zu „C:\XAMPP\pgsql“.

Danach installieren wir phpPgAdmin, ein adäquat zu phpMyAdmin um die Datenbank zu verwalten.
Dazu legen wir im xampp Ordner den Ordner „C:\XAMPP\phpPgAdmin“ an.
phpPgAdmin downloaden unter http://phppgadmin.sourceforge.net/doku.php?id=download

Jetzt müssen wir xampp noch dazu bringen auch mit der PostgreSQL zusammen zuarbeiten.
Dazu editieren wir die Datei „C:\XAMPP\phpPgAdmin\conf\config.inc.php“.
Sucht dort nach der Zeile

$conf[‚extra_login_security‘] = true;

und ändert diese in

$conf[‚extra_login_security‘] = false;

In der Datei „php.ini“ im Verzeichnis „C:\XAMPP\php“ sucht ihr die Zeile

;extension=php_pgsql.dll

und ändert diese in

extension=php_pgsql.dll

In der Datei „http-xampp.conf“ im Verzeichnis „C:\XAMPP\apache\conf\extra“ sucht ihr nach dem folgenden AbschnittfügtAlias /phpmyadmin „C:/XAMPP/phpMyAdmin/“
<Directory „C:/XAMPP/phpMyAdmin“>
AllowOverride AuthConfig
</Directory>

Und fügt darunter die folgende Zeile hinzu:

Alias /phppgadmin „C:/XAMPP/phppgadmin/“
<Directory „C:/XAMPP/phppgadmin“>
Options Indexes FollowSymLinks MultiViews
AllowOverride all
Require local
Order Deny,Allow
Allow from all
</Directory>

Jetzt den Apache-Server neu starten (geht direkt über das XAMPP Control-Programm) und Ihr könnt über den Web-Browser und der URL (http://localhost/phppgadmin) auf den PostgreSQL-Server zugreifen.

Falls benötigt, der Default-User ist „postgres“ 😉

Please share this article von facebook & google plus or where you want, thank you!

Magento 1.9.2.2 Upgrade Conflict issue / SUPEE-6788 security patch – Solution for this problem

10. November 2015 at 11:25

db

Magento has released a new upgrade for Magento which includes the SUPEE-6788 Patch Bundle. Note that this upgrade can break some modules which are not correctly coded.

I have tested the upgrade thru Magento Connect Manager but it failed.

I am testing in Linux Bash / Windows CLI:

chmod 755 mage
sudo -u www-data ./mage list-upgrades
sudo -u www-data ./mage upgrade-all

I have the same error in command line

Error:
upgrade-all: Failed to delete files: /home/data/www/magento_dev/./pkginfo/Mage_All_Latest.txt
Check permissions
Error:
upgrade-all: Package community/Interface_Adminhtml_Default 1.9.2.2 conflicts with: community/Mage_All_Latest 1.9.2.1
Error:
upgrade-all: Package community/Interface_Frontend_Default 1.9.2.2 conflicts with: community/Mage_All_Latest 1.9.2.1
Error:
upgrade-all: Package community/Interface_Install_Default 1.9.2.2 conflicts with: community/Mage_All_Latest 1.9.2.1
Error:
upgrade-all: Package community/Mage_Downloader 1.9.2.2 conflicts with: community/Mage_All_Latest 1.9.2.1
Error:
upgrade-all: Package community/Mage_Centinel 1.9.2.2 conflicts with: community/Mage_All_Latest 1.9.2.1
...

On stack exchange, there are some idea how to proceed.

Solution – First Step

cd pkginfo
# rm -Rf Mage_All_Latest.txt Mage_All.txt
# cd ..
# sudo -u www-data ./mage upgrade-all
Installing package community/Mage_All_Latest 1.9.2.2
Package community/Mage_All_Latest 1.9.2.2 installed successfully
Starting to download Interface_Adminhtml_Default-1.9.2.2.tgz ...
...done: 1,014,275 bytes
Installing package community/Interface_Adminhtml_Default 1.9.2.2
Package community/Interface_Adminhtml_Default 1.9.2.2 installed successfully
Starting to download Interface_Frontend_Default-1.9.2.2.tgz ...
...done: 747,738 bytes
Installing package community/Interface_Frontend_Default 1.9.2.2
...

Now delete the maintenance.flag file and your shop is updated and online! 🙂

Please share this article von facebook & google plus or where you want, thank you!

Magento MySQL Database Error: MySQL server has gone away

7. Oktober 2015 at 15:51

sql-statement-mysql

If you get an exception error like this in the Magento Exception-Log-File:

ERR (3): exception ‚PDOException‘ with message ‚SQLSTATE[HY000]: General error: 2006 MySQL server has gone away‘ in …/lib/Zend/Db/Statement/Pdo.php:228 Stack trace:

Explanation: It is clearly visible that this is the MySQL timeout error. When you are using shared hosting and you get the huge traffic, so in this case a huge requests sends to MySQL and your request wait for a long time and finally timeout. Another case, If there is one DB connection and fetch some data from DB and do some stuff longer than DB timeout and now if you try to fetch data with same connection you will get the error MySQL server has gone away.

Solutions: You should use dedicated hosting if you are getting a huge traffic to your website instead of shared hosting. Secondly, you should close the DB connection after fetching data and create new DB connection to fetch data again and close the DB connection. If the problem remain same then you need to increase wait_timeout, connect_timeout and max_allowed_packet in my.ini or my.cnf file.

I have changed my my.ini settings as below:
max_allowed_packet = 32M
wait_timeout = 1800
connect_timeout = 120

To change these in your mysql’s my.cnf/my.ini configuration file follow below steps:
For windows: open mysql-install-dir/bin/my.ini and set wait_timeout = 1800 , max_allowed_packet = 32M and connect_timeout = 120 then save and restart mysql server.

For Linux: open /etc/mysql/my.cnf and set wait_timeout = 1800 , max_allowed_packet = 32M and connect_timeout = 120 then save and restart mysql server.

This solution solved my problem of SQLSTATE[HY000]: General error: 2006 MySQL server has gone away.

Please share this article von facebook & google plus or where you want, thank you!
Fix: TypeError: jQuery(.sf-menu).superfish is not a function

14. September 2015 at 15:40

XHTML

If you’re working with the superfish drop down menu and you’re getting the error message „TypeError: jQuery(.sf-menu).superfish is not a function“ it is possible that you’re loading the jquery script twice, e.g.:

<script type="text/javascript" src="/assets/js/jquery-1.2.6.min.js"></script>
<script type="text/javascript" src="/skin/frontend/default/default/js/jquery-1.11.1.min.js"></script>

Solution 1

Remove the dublicated js-implementation (remove one of this lines)

Solution 2

If you need to include two versions of jquery on the same page because of plugin support or so …
Change the lines

jQuery(function(){
	jQuery('.sf-menu').superfish()
})

to

jQuery(function(){
	$(document).ready(function(){
		jQuery('.sf-menu').superfish()
	});
})

if you get an error like „$(document).ready is not a function“
use:

(function($){
	$(document).ready(function(){
		$('.sf-menu').superfish()
	});
})(jQuery);

Please share this article von facebook & google plus or where you want, thank you!

Magento: Access Denied errors after installing SUPEE-6285 or since Magento 1.9.2.1 – ACL Error – Solution

13. August 2015 at 15:06

If you use restricted admin accounts, some menus of third party extensions might not work anymore for them. The reason is that the default return value of Mage_Adminhtml_Controller_Action::_isAllowed() has been changed from true to Mage::getSingleton(‚admin/session‘)->isAllowed(‚admin‘). Extensions that do not override this method in their admin controllers because they don’t use the ACL, now need the „ALL“ privilege.

The only solution is to patch the extensions and add this method to all their admin controllers:

protected function _isAllowed()
{
  return true;
}

Or if they actually have an ACL resource defined in etc/adminhtml.xml:

protected function _isAllowed()
{
  return Mage::getSingleton('admin/session')->isAllowed('ENTER RESOURCE IDENTIFIER HERE'); //e.g. 'admin/sales/productreturn'</pre>
} 


Please share this article von facebook & google plus or where you want, thank you!